100_1991

This is actually one of the funnest things I do, but it’s incredibly time consuming.  Enjoy a photo tutorial showing how I turned two strips of brass into two etched patina butterfly bracelets.  The whole project takes about two days.

Step 1:
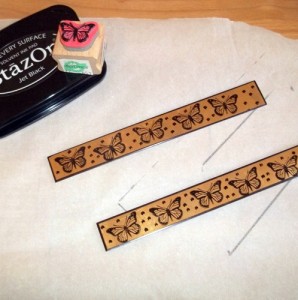
A butterfly design is stamped onto two brass blanks and I've used a Sharpie to give the bracelets a border and add some polka dots.

A butterfly design is stamped onto two brass blanks and I’ve used a Sharpie to give the bracelets a border and add some polka dots.

Step 2:

Masking tape is applied to the back of the bracelets so they can suspend into a vat of acid.  The acid will not eat through the tape.

Masking tape is applied to the back of the bracelets so they can suspend into a vat of acid. The acid will not eat through the tape.

Step 3:

Etching solution is poured over the suspended bracelets and  they're left to soak for about an hour.

Etching solution is poured over the suspended bracelets and they’re left to soak for about an hour.

Step 4:

This is all done on my front porch.  With gloves. I don't want the acid touching me.

This is all done on my front porch. With gloves. I don’t want the acid touching me.

Step 5:

After soaking in etching solution for an hour the blanks are soaked in a solution of baking soda and water to neutralize the acid.  the acid eats away the metal parts that don't have an ink resist on them, so now my design is raised.

After soaking in etching solution for an hour the blanks are soaked in a solution of baking soda and water to neutralize the acid. The acid eats away the metal parts that don’t have an ink resist on them, so now my design is raised.

Step 6:

To remove the remaining ink, the blanks are soaked in acetone in a glass pan.

To remove the remaining ink, the blanks are soaked in acetone in a glass pan.

Step 7:

Now you can see I have a three dimensional relief.

Now you can see I have a three dimensional relief.

Step 8:

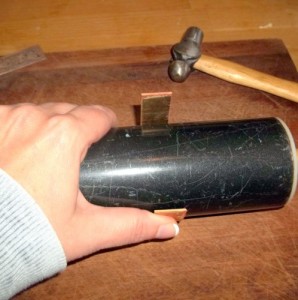
Now the blanks are hammered into a shape for a cuff bracelet.  I use a rolling pin as a form because I'm too cheap to spend the money on a professional mandrel.  They're expensive.

Now the blanks are hammered into a shape for a cuff bracelet. I use a rolling pin as a form because I’m too cheap to spend the money on a professional mandrel. They’re expensive.

Step 9:

Now they're starting to look like bracelets but they're still ugly.

Now they’re starting to look like bracelets but they’re still ugly.

Step 10:

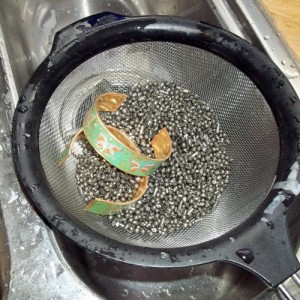
The cuffs go into my rock tumbler with stainless steel shot, a drop of dish soap, and water.  An hour or so of tumbling hardens the metal and removes any rough edges.

The cuffs go into my rock tumbler with stainless steel shot, a drop of dish soap, and water. An hour or so of tumbling hardens the metal and removes any rough edges.

Step 11:

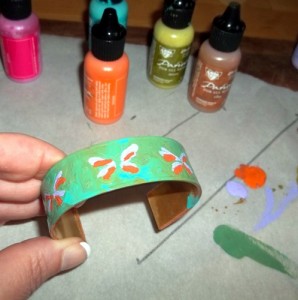
Now I'm applying 3 colors of patina for the background color.  Smudging with fingers gives a better effect than a paint brush.

Now I’m applying 3 colors of patina for the background color. Smudging with fingers gives a better effect than a paint brush.

Step 12:

Once the background color has dried, I add color to the butterfly wings.  Still pretty ugly, huh?

Once the background color has dried, I add color to the butterfly wings. Still pretty ugly, huh?

Step 13:

After drying for a night, I use a sanding block on the bracelets.  The patina is removed from the raised parts of the bracelet giving my butterflies beautiful gold edged wings.

After drying for a night, I use a sanding block on the bracelets. The patina is removed from the raised parts of the bracelet giving my butterflies beautiful gold edged wings.  The top bracelet has been sanded, the bottom one has not.

Step 14:

Back into the tumbler the bracelets go to shine up the now exposed brass and polish them up again.

Back into the tumbler the bracelets go to shine up the now exposed brass and polish them up again.

Step 15:

After about a half hour of tumbling they're rinsed, drained, and dried.

After about a half hour of tumbling they’re rinsed, drained, and dried.

The result:

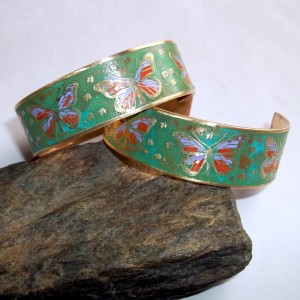
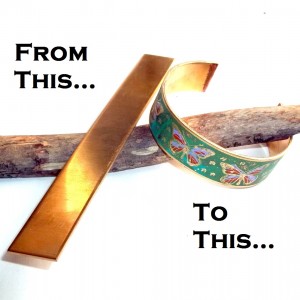
The finished bracelets, photographed and put up for sale.

The finished bracelets, photographed and put up for sale.

Tips for etching copper and brass:

~It’s messy.  Wear old clothes, do it outside, and don’t expect your manicure to survive.

~Your design options are only limited by what you can draw or stamp on your blanks.  I can’t draw squat, so I stick to rubber stamps.

~If you don’t ink off the borders of your pieces the edges will be rough and ugly.

~Etching solution can be saved and reused for the next batch.

~You can’t put etching solution in a metal container.  Get cheap plastic ones that will never be used for food again.

~Use coarse sanding blocks or you’ll be sanding the patina off for hours with little result.

~I use raw copper or brass.  I haven’t tried sterling yet because it’s so ridiculously expensive.

Enjoy!

Chrisy Bossie
This entry was posted on Friday, March 1st, 2013 at 11:58 am and is filed under All Posts. You can follow any responses to this entry through the RSS 2.0 feed. Both comments and pings are currently closed.

5 comments so far

Susan
 1 

Really cool! Thanks for sharing this, it’s great to see how they are made and all you do to get such a beautiful end result!

March 1st, 2013 at 1:52 pm
Mom
 2 

This is neat……….and interesting. I’m amazed at how you keep coming up with new ideas for your jewelry. Great job on the “photo tutorial” also!

March 1st, 2013 at 10:25 pm
Melva Kell
 3 

simply awesome! I am learning and love your site! Ty So Much!!

March 3rd, 2013 at 9:56 am
Laurie
 4 

I’m working with silver and have a created a very light etch…regular patina is not showing up when I buff it out. Could you please share what type of color patina you are using? I might give that a try! Enjoyed the tutorial ~ thanks for sharing!

May 23rd, 2013 at 1:54 am
 5 

Laurie, I use Vintaj patinas. I want to try Chalk Paints but haven’t yet. Vintaj makes a glaze too, if you want a shiny finish, but I’m not really fond of the effect. If your patina is disappearing after sanding your etch may be too light and you may need to soak your pieces in acid longer to make your relief deeper.

May 23rd, 2013 at 6:58 am